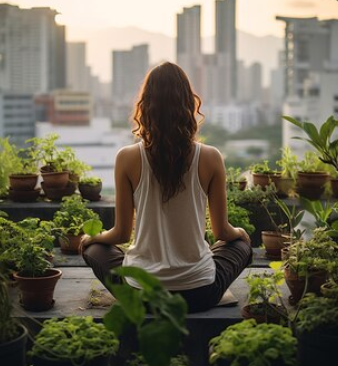
In order to enhance one’s physical, mental, and spiritual well-being, yoga combines physical postures, breathing techniques, meditation, and ethical ideals. Yoga was first performed in ancient India and has since evolved over thousands of years to be practiced in many forms all over the world.
1.Warm-Up
A thorough yoga warm-up lowers the chance of injury, gets your body ready for yoga practice, and improves your overall performance. Here are a few quick and efficient warm-ups to prepare your body for a beginning yoga class:
Warm-Up Routine (5-10 minutes)
Seated Forward Bend (Paschimottanasana):
- Sit with your legs extended straight in front of you.
- Inhale and lengthen your spine, then exhale and fold forward from your hips, reaching for your toes.
- Hold for 5-10 breaths.
Cat-Cow Stretch (Marjaryasana-Bitilasana):
- Begin on your hands and knees in a tabletop position.
- Inhale, arch your back, and lift your head and tailbone towards the ceiling (Cow Pose).
- Exhale, round your spine, and tuck your chin to your chest (Cat Pose).
- Repeat for 5-10 breaths.
Child’s Pose (Balasana):
- From a tabletop position, sit back on your heels and stretch your arms forward, resting your forehead on the mat.
- Hold for 5-10 breaths.
Neck Rolls:
- Sit comfortably or stand with a straight spine.
- Slowly roll your head in a circular motion, first clockwise, then counterclockwise.
- Do this for about 30 seconds in each direction.
Shoulder Rolls:
- Stand or sit with your spine straight.
- Roll your shoulders up towards your ears, then back and down.
- Do this for 10-15 seconds, then reverse the direction.
Arm Circles:
- Stand with your feet hip-width apart.
- Extend your arms out to the sides and make small circles.
- Gradually increase the size of the circles.
- Do this for about 30 seconds, then reverse the direction.
Torso Twists:
- Stand with your feet hip-width apart and place your hands on your hips.
- Gently twist your torso to the right, then to the left.
- Repeat for 10-15 twists on each side.
Hip Circles:
- Stand with your feet slightly wider than hip-width apart.
- Place your hands on your hips and make circular movements with your hips.
- Do this for about 30 seconds in each direction.
Leg Swings:
- Stand next to a wall or chair for support.
- Swing one leg forward and backward, keeping it straight.
- Do this for about 15-20 swings, then switch to the other leg.
Ankle Rolls:
- Sit or stand and lift one foot off the ground.
- Rotate your ankle in a circular motion, first clockwise, then counterclockwise.
- Do this for about 15-20 seconds on each ankle.
Sample Warm-Up Flow
- Neck Rolls and Shoulder Rolls: 1 minute
- Arm Circles and Torso Twists: 1-2 minutes
- Cat-Cow Stretch: 1-2 minutes
- Child’s Pose: 1 minute
- Hip Circles and Leg Swings: 2-3 minutes
- Seated Forward Bend and Ankle Rolls: 1-2 minutes
2.Sun Salutations
The dynamic series of yoga positions known as Sun Salutations, or Surya Namaskar, flow with the breath. It’s a great way to warm up your body, increase flexibility and strength, and start your day. This is a detailed tutorial on how to do Sun Salutations:
Sun Salutation (Surya Namaskar) Sequence
Mountain Pose (Tadasana):
- Stand tall with your feet together and arms at your sides.
- Inhale deeply, grounding your feet and lifting through the crown of your head.
Raised Arms Pose (Urdhva Hastasana):
- Inhale and raise your arms overhead, palms touching or facing each other.
- Arch your back slightly and look up.
Standing Forward Bend (Uttanasana):
- Exhale and bend forward from your hips, bringing your hands to the floor beside your feet. If necessary, bend your knees slightly.
Halfway Lift (Ardha Uttanasana):
- Inhale and lift your torso halfway, placing your hands on your shins or fingertips on the floor, and lengthen your spine.
Plank Pose (Phalakasana):
- Exhale, place your hands on the floor, and step or jump back into Plank Pose.
- Keep your body in a straight line from head to heels, engaging your core.
Four-Limbed Staff Pose (Chaturanga Dandasana):
- Exhale and lower your body, keeping elbows close to your sides, until your shoulders are at the same height as your elbows.
- For beginners, you can lower your knees to the floor first (Knee-Chest-Chin Pose).
Upward-Facing Dog (Urdhva Mukha Svanasana):
- Inhale and roll over your toes, lifting your chest and thighs off the floor.
- Straighten your arms, open your chest, and look forward or slightly up.
Downward-Facing Dog (Adho Mukha Svanasana):
- Exhale and lift your hips up and back, forming an inverted V shape with your body.
- Spread your fingers wide and press your heels toward the floor. Hold for 5 breaths.
Halfway Lift (Ardha Uttanasana):
- Inhale and step or jump your feet forward between your hands, lifting your torso halfway up.
Standing Forward Bend (Uttanasana):
- Exhale and fold forward over your legs, relaxing your head and neck.
Raised Arms Pose (Urdhva Hastasana):
- Inhale, rise up to standing, and stretch your arms overhead again.
Mountain Pose (Tadasana):
- Exhale and bring your arms down by your sides, returning to Mountain Pose.
Tips for Practicing Sun Salutations yoga
- Breath: Synchronize each movement with your breath. Inhale for upward movements and exhale for downward movements.
- Flow: Aim for a smooth and continuous flow from one pose to the next.
- Repetitions: Start with 3-5 rounds, gradually increasing as you build strength and endurance.
- Modifications: If needed, modify the poses to suit your level. For example, lower your knees in Plank or Chaturanga if you need more support.
Benefits of Sun Salutations
- Cardiovascular Health: Increases heart rate and promotes cardiovascular health.
- Flexibility: Stretches and lengthens the muscles, improving flexibility.
- Strength: Builds strength in the legs, arms, and core.
- Energy: Energizes the body and mind, making it a great way to start the day.
- Mindfulness: Encourages a mindful connection between breath and movement, reducing stress and promoting mental clarity.
3.Yoga Standing Poses
Standing yoga postures are a great way to increase flexibility, balance, and strength. The following standing yoga positions are suitable for beginners and can help with weight loss:
1. Mountain Pose (Tadasana)
- Steps:
- Stand with your feet together or hip-width apart.
- Distribute your weight evenly across both feet.
- Engage your thigh muscles and lift your kneecaps.
- Lengthen your tailbone down and lift your chest.
- Relax your shoulders away from your ears and reach your arms down alongside your body with palms facing forward.
- Hold for 5-10 breaths.
2. Warrior I (Virabhadrasana I)
- Steps:
- Start in Mountain Pose.
- Step your left foot back about 3-4 feet.
- Turn your left foot out to a 45-degree angle.
- Bend your right knee over your right ankle.
- Raise your arms overhead, palms facing each other.
- Square your hips toward the front.
- Hold for 5-10 breaths, then switch sides.
3. Warrior II (Virabhadrasana II)
- Steps:
- From Mountain Pose, step your left foot back about 3-4 feet.
- Turn your left foot out to a 90-degree angle.
- Bend your right knee over your right ankle.
- Extend your arms parallel to the ground, palms down.
- Turn your head to gaze over your right hand.
- Hold for 5-10 breaths, then switch sides.
4. Extended Side Angle Pose (Utthita Parsvakonasana)
- Steps:
- From Warrior II, place your right forearm on your right thigh or bring your right hand to the floor outside your right foot.
- Extend your left arm over your left ear, palm facing down.
- Turn your head to look up at your left hand.
- Hold for 5-10 breaths, then switch sides.
5. Triangle Pose (Trikonasana)
- Steps:
- From Warrior II, straighten your front leg.
- Reach your right hand forward and lower it to your shin, ankle, or the floor.
- Extend your left arm up toward the ceiling.
- Turn your head to gaze at your left hand.
- Hold for 5-10 breaths, then switch sides.
6. Chair Pose (Utkatasana)
- Steps:
- Stand with your feet together.
- Bend your knees and sit your hips back as if you’re sitting in a chair.
- Raise your arms overhead, palms facing each other.
- Keep your chest lifted and your weight in your heels.
- Hold for 5-10 breaths.
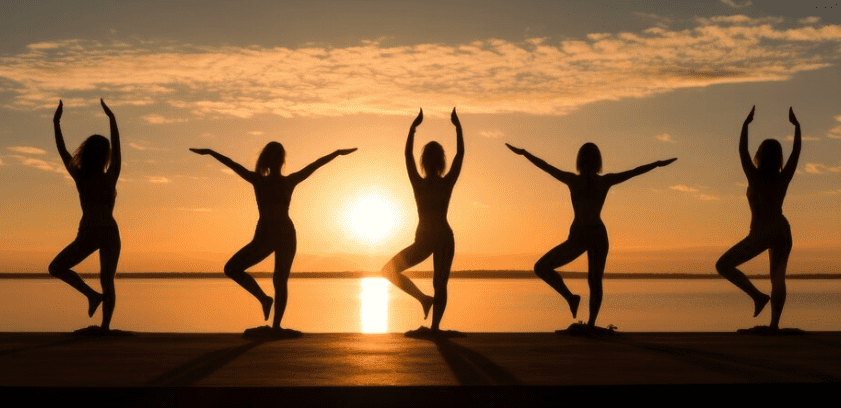
7. Tree Pose (Vrksasana)
- Steps:
- Stand with your feet together.
- Shift your weight onto your left foot and lift your right foot off the ground.
- Place the sole of your right foot on your inner left thigh or calf (avoid the knee).
- Bring your hands to your heart or extend them overhead.
- Hold for 5-10 breaths, then switch sides.
Tips for Practicing Standing Poses
- Alignment: Pay attention to your alignment in each pose to avoid injury.
- Breathing: Use your breath to help maintain balance and stability.
- Focus: Find a focal point (drishti) to help with balance, especially in poses like Tree Pose.
- Modifications: Use props or modify poses as needed to make them more accessible.
4.Cool Down
It’s critical to cool down after a yoga practice in order to promote relaxation, release tension in your muscles, and shield your body from harm. You might adhere to the following mild and efficient cool-down sequence:

Cool Down Sequence (5-10 minutes)
Seated Forward Bend (Paschimottanasana):
- Steps: Sit with your legs extended straight in front of you. Inhale to lengthen your spine, and exhale to hinge forward from your hips, reaching for your toes. Keep your back straight as you fold.
- Hold: 1-2 minutes, breathing deeply.
Supine Twist (Supta Matsyendrasana):
- Steps: Lie on your back with your arms extended out to the sides. Bend your knees and bring them to your chest, then lower them to the right side, stacking your knees and keeping your shoulders grounded. Turn your head to the left for a gentle twist.
- Hold: 1-2 minutes on each side, breathing deeply.
Happy Baby Pose (Ananda Balasana):
- Steps: Lie on your back and draw your knees toward your chest. Hold onto the outsides of your feet with your hands, opening your knees wider than
your torso. Gently pull your feet down, bringing your knees closer to your armpits while keeping your lower back on the ground.
- Hold: 1-2 minutes, breathing deeply.
Child’s Pose (Balasana):
- Steps: Kneel on the floor, touching your big toes together and sitting on your heels. Separate your knees about hip-width apart, then fold forward, extending your arms in front of you and resting your forehead on the mat.
- Hold: 2-3 minutes, breathing deeply and relaxing your entire body.
Reclining Bound Angle Pose (Supta Baddha Konasana):
- Steps: Lie on your back and bring the soles of your feet together, allowing your knees to fall open to the sides. Place your arms comfortably by your sides with palms facing up.
- Hold: 2-3 minutes, breathing deeply and focusing on releasing tension from your hips and inner thighs.
Corpse Pose (Savasana):
- Steps: Lie flat on your back with your legs extended and arms relaxed by your sides, palms facing up. Close your eyes and let your entire body relax into the mat.
- Hold: 3-5 minutes, breathing naturally and allowing your body to fully relax and absorb the benefits of your practice.
Tips for an Effective Cool Down
- Deep Breathing: Focus on slow, deep breaths during each pose to help calm your nervous system and promote relaxation.
- Stay Present: Keep your mind focused on your breath and the sensations in your body, avoiding any distractions.
- Gentle Movements: Move slowly and mindfully between poses to avoid any strain or injury.
- Comfort: Use props like blankets or cushions if needed to make the poses more comfortable, especially if you feel any discomfort in your knees or lower back.
5.Relaxation
A key component of every yoga practice and general wellbeing is relaxation. It aids in stress reduction, mental acuity, and physical renewal. You may include the following beneficial postures and relaxation methods into your regular routine:
Relaxation Poses
Corpse Pose (Savasana):
- This is the ultimate relaxation pose, typically done at the end of a yoga session.
- Steps: Lie flat on your back with your legs slightly apart and arms by your sides, palms facing up. Close your eyes and breathe deeply, focusing on relaxing every part of your body.
Child’s Pose (Balasana):
- A gentle resting pose that calms the mind and relieves tension in the body.
- Steps: Kneel on the floor, sit back on your heels, and stretch your arms forward on the mat while lowering your torso between your thighs. Rest your forehead on the mat.
Legs-Up-the-Wall Pose (Viparita Karani):
- This pose promotes relaxation by reducing tension in the legs and lower back and enhancing circulation.
- Steps: Sit next to a wall and lie down on your back. Extend your legs up the wall, keeping your body at a 90-degree angle. Rest your arms by your sides and close your eyes.
Reclining Bound Angle Pose (Supta Baddha Konasana):
- Opens the hips and chest, promoting deep relaxation and stress relief.
- Steps: Lie on your back, bend your knees, and bring the soles of your feet together. Allow your knees to fall open to the sides. Place your arms by your sides with palms facing up.
Breathing Techniques
Deep Breathing (Diaphragmatic Breathing):
- Helps calm the mind and reduce stress.
- Steps: Sit or lie down in a comfortable position. Inhale deeply through your nose, allowing your abdomen to rise. Exhale slowly through your nose, letting your abdomen fall. Repeat for several minutes.
Alternate Nostril Breathing (Nadi Shodhana):
- Balances the nervous system and promotes mental clarity.
- Steps: Sit comfortably and close your right nostril with your right thumb. Inhale deeply through your left nostril. Close your left nostril with your right ring finger, release your right nostril, and exhale through the right. Inhale through the right nostril, close it, and exhale through the left. Repeat for several cycles.
4-7-8 Breathing:
- Aids in relaxation and can help with sleep.
- Steps: Inhale quietly through your nose for 4 counts, hold your breath for 7 counts, and exhale completely through your mouth for 8 counts. Repeat for several cycles.
Guided Relaxation and Meditation
Body Scan Meditation:
- Promotes awareness and relaxation by focusing on different parts of the body.
- Steps: Lie down comfortably and close your eyes. Starting from your toes, mentally scan your body, paying attention to each part and releasing tension as you go. Move up slowly to the top of your head.
Guided Imagery:
- Uses visualization to create a state of relaxation.
- Steps: Sit or lie down comfortably. Close your eyes and imagine a peaceful scene, such as a beach, forest, or meadow. Engage all your senses in the imagery—what you see, hear, smell, and feel. Spend several minutes in this visualization.
Mindfulness Meditation:
- Focuses on being present in the moment without judgment.
- Steps: Sit comfortably with your eyes closed. Pay attention to your breath, noticing the inhale and exhale. If your mind wanders, gently bring your focus back to your breath.
Tips for Effective Relaxation
- Create a Calm Environment: Find a quiet, comfortable space where you won’t be disturbed. Dim the lights and play soft music or nature sounds if it helps you relax.
- Use Props: Use pillows, blankets, or yoga bolsters to support your body in relaxation poses.
- Consistency: Practice relaxation techniques regularly, ideally daily, to reap the full benefits.
- Stay Present: Focus on the present moment and let go of any thoughts or worries.